Running the Application Locally With Docker Compose
In this step, we will see how to run your application in your local environment with everything you need.
If this were just a simple SpringBoot application we will simply have to run it from oir IDE. But our application needs to rely on some external messaging infrastructure to route, store and deliver the messages (commands, events and queries). In our case we will use Axon Server which acts both as a message broker to route the messages and as an event store optimized for storing and retrieving events in an Event Sourcing-based system.
To avoid having to installing and starting the Axon Server manually, we rely on the Axon Server Docker images, and SpringBoot’s support to start docker containers. In this section you will learn how to configure it to run with a single click everything you need.
Requisites
To run everything we need easily and with just one click (or shortcut key combination) from your IDE we will use Docker Compose and docker images to start the Axon Server.
Make sure you have installed the Docker Engine in your system, or Install Docker Engine otherwise.
Configuring Docker Compose
Docker Compose descriptor
Docker Compose is a tool that allows you to define all the docker containers, networks, volumes and any other characteristics that we need from the infrastructure to run our application.
Even if we are going to run only one docker image (Axon Server), Docker Compose is convenient because allows to start everything in one comand.
We will start by creating the Docker Compose configuration file. Create a compose.yaml file in the root project with the following contents:
services:
  axonserver: (1)
    image: 'axoniq/axonserver:latest'  (2)
    environment: (3)
      - 'AXONIQ_AXONSERVER_STANDALONE=TRUE'
    ports: (4)
      - '8024:8024'  (5)
      - '8124:8124'  (6)
| 1 | We define the name of the service for axonserver. This will be the name used for the service when started by Docker Desktop |
| 2 | The axoniq/axonserver:latest image refers to the docker image for the latest Axon Server published in the public dockerhub images repository. |
| 3 | We set the AXONIQ_AXONSERVER_STANDALONE environment property to TRUE so that Axon Server starts without the need to do the initial configuration. |
| 4 | We configure the ports that will be exported from the running docker container: |
| 5 | 8024 is the default port to access the Axon Server console from your browser. |
| 6 | 8124 is Axon Server’s gRPC port used by the applications. |
| YAML files are sensible to tabs and spaces. Make sure you use the correct indentation using tabs. |
Once that we have this file you should be able to run the axon server image from the command line:
bike-rental-quick-start % docker-compose  up
[+] Running 1/0
 ✔ Container bike-rental-quick-start-axonserver-1  Created                                                                                                                             0.0s
Attaching to axonserver-1
...
We don’t want to start the server manually, we will configure SpringBoot’s support for Docker Compose so that the docker containers are started automatically when running the application from our IDE.
Stop the container by typing ^C on the console and move to the next section.
Configuring SpringBoot support to run Docker Compose
Since v3.1 Supports starting Docker Compose services linked to the start of our application.
To enable that feature, we will need to add the following dependency to the maven descriptor pom.xml file in our root project:
<dependencies>
	<dependency>
		<groupId>org.springframework.boot</groupId>
		<artifactId>spring-boot-docker-compose</artifactId>
		<scope>runtime</scope>
		<optional>true</optional>
	</dependency>
</dependencies>
Once that we have added this dependency, we can run our application right from our IDE. SpringBoot will detect the compose.yaml file and will start the docker containers described in that file.
Running the application
Run your application from your IDE. You should see in the logs how SpringBoot dowloads the AxonServer docker image, and starts running AxonServer automatically for you before starting your application:
. ____ _ __ _ _
/\\ / ___'_ __ _ _(_)_ __ __ _ \ \ \ \
( ( )\___ | '_ | '_| | '_ \/ _` | \ \ \ \
\\/ ___)| |_)| | | | | || (_| | ) ) ) )
' |____| .__|_| |_|_| |_\__, | / / / /
=========|_|==============|___/=/_/_/_/
:: Spring Boot :: (v3.2.1)
INFO --- [Rental Monolith] i.a.d.b.rental.RentalApplication : Starting RentalApplication using Java 21 with PID 69132 (/Users/dgomezg/projects/axon/code-samples/bike-rental-quick-start/rental/target/classes started by dgomezg in /Users/dgomezg/projects/axon/code-samples/bike-rental-quick-start)
INFO --- [Rental Monolith] i.a.d.b.rental.RentalApplication : No active profile set, falling back to 1 default profile: "default"
INFO --- [Rental Monolith] .s.b.d.c.l.DockerComposeLifecycleManager : Using Docker Compose file '/Users/dgomezg/projects/axon/code-samples/bike-rental-quick-start/compose.yaml'
INFO --- [Rental Monolith] o.s.boot.docker.compose.core.DockerCli : Container bike-rental-quick-start-axonserver-1 Created
INFO --- [Rental Monolith] o.s.boot.docker.compose.core.DockerCli : Container bike-rental-quick-start-axonserver-1 Starting
INFO --- [Rental Monolith] o.s.boot.docker.compose.core.DockerCli : Container bike-rental-quick-start-axonserver-1 Started
INFO --- [Rental Monolith] o.s.boot.docker.compose.core.DockerCli : Container bike-rental-quick-start-axonserver-1 Waiting
INFO --- [Rental Monolith] o.s.boot.docker.compose.core.DockerCli : Container bike-rental-quick-start-axonserver-1 Healthy
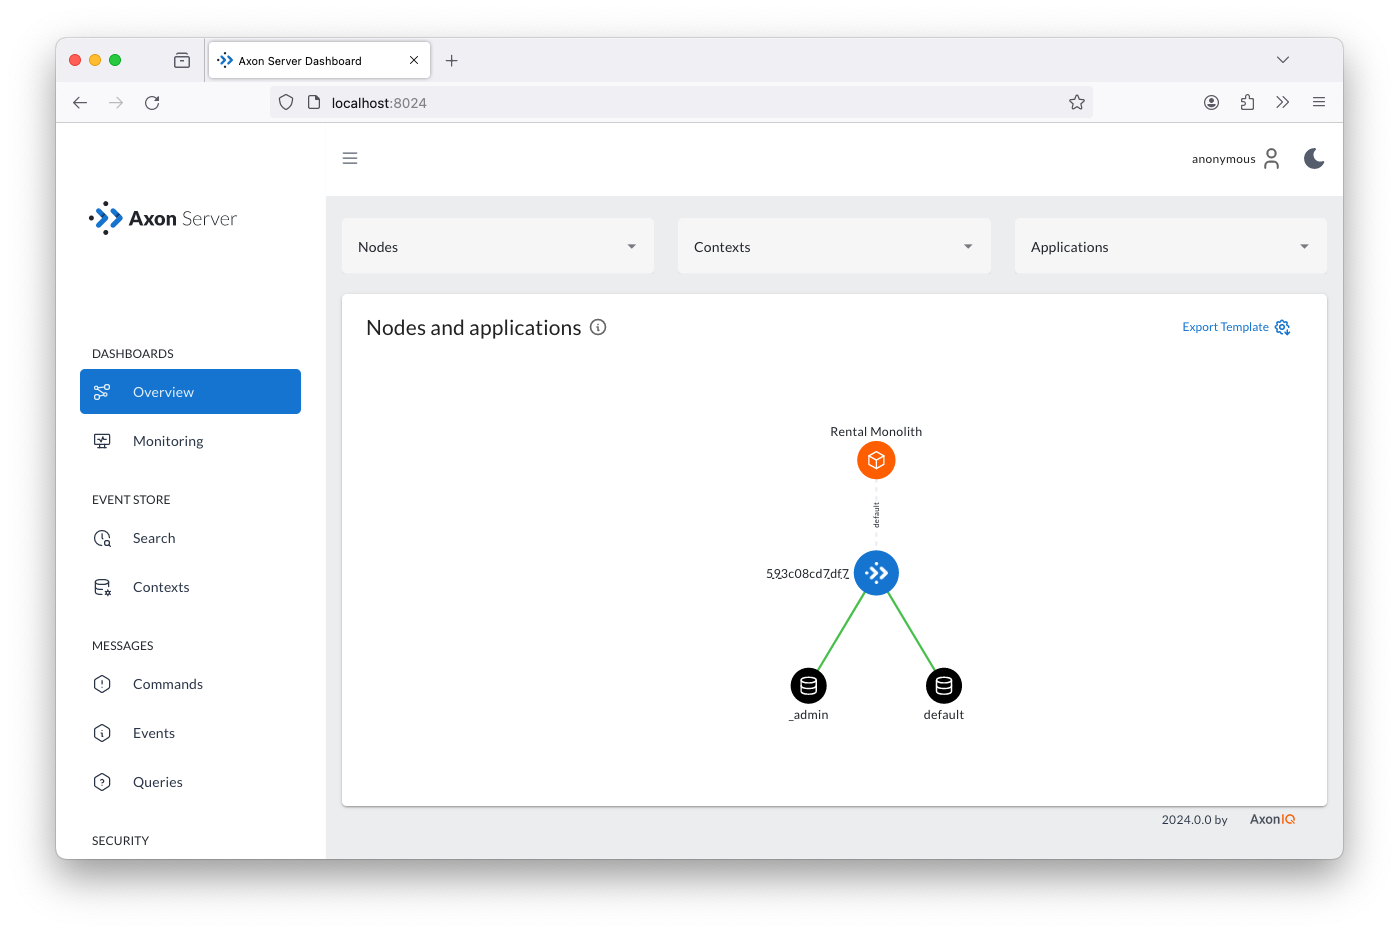
INFO --- [Rental Monolith] verDockerComposeConnectionDetailsFactory : Detected Axon Server container. To access the dashboard, visit http://127.0.0.1:8024After the application starts, you can open your browser and go to http://localhost:8024. You will access the Axon Server dashboard.
If you click on the "Overview" button from the right panel, you will see the Axon Server instance and your Rental Monolith Application connected to it.
In the next step we will implement the feature to retrieve a list of all the bikes in our system. So, we will look at how to implement the Query Model with some projections.