Running the Register Bike Endpoint
Now that we have our first feature implemented, and our application up and running, we can try to invoke the endpoint to register a bike, and check the exchange of commands and events.
Invoking the endpoint
To test our feature, we need to send the following HTTP request:
POST http://localhost:8080/bikes?bikeType={type}&location={city}
You can do this directly from the command line, any other HTTP REST client you are used to, or if you are using IntelliJ IDEA as your IDE, we will show you how to prepare a file to quickly execute the HTTP Endpoints we are going to use in this project.
From the command line
You can easily invoke the endpoint from the command line by typing the following curl command in your terminal.
> curl -X POST "http://localhost:8080/bikes?bikeType=city&location=Utrecht"The command will print out the response of the endpoint call, which, in our case, will be the UUID assigned to the new bike.
Although we are sending a POST HTTP request, in this case we don’t need to specify any content in the body request, as all the information is specified in the URL parameters. This way may not be the most recommended design for POST requests in REST services as the required information usually f from the request body and it is specified using either -d, -F or --json options in your curl command). Anyway, for simplicity’s sake, we have designed our first POST endpoint to have all the required information in the URL parameters.
|
Using IntelliJ IDEA
If you are using IntelliJ IDEA as your IDE, you can benefit from its HTTP Client plugin to define and invoke all the endpoints of your application.
You only need to create a file with .http or .rest extension. Then, you can add the URL of the different endpoints you want to invoke in your system. The various requests should be separated by a line with three hashtag marks (###).
Start by creating a text file called requests.http in your root project, and add the following content to it:
### Register a new bike
POST http://localhost:8080/bikes?bikeType=city&location=Utrecht

###
Save the file, and you will see that IntelliJ IDEA now decorates the line containing the POST URL with a green "play" button. If you click on it while the 'rental' application is running, you will see how the request is being sent and executed.
POST http://localhost:8080/bikes?bikeType=city&location=Utrecht

HTTP/1.1 200 OK
Vary: Origin
Vary: Access-Control-Request-Method
Vary: Access-Control-Request-Headers
Content-Type: text/plain;charset=UTF-8
Content-Length: 36

8427681b-1ee6-4e0a-b5d8-c524b9ed553d

Response code: 200 (OK); Time: 591ms (591 ms); Content length: 36 bytes (36 B)
Following the execution of the register bike request in Axon Server
After invoking the endpoint, we can check how our application processed the request and what messages were sent.
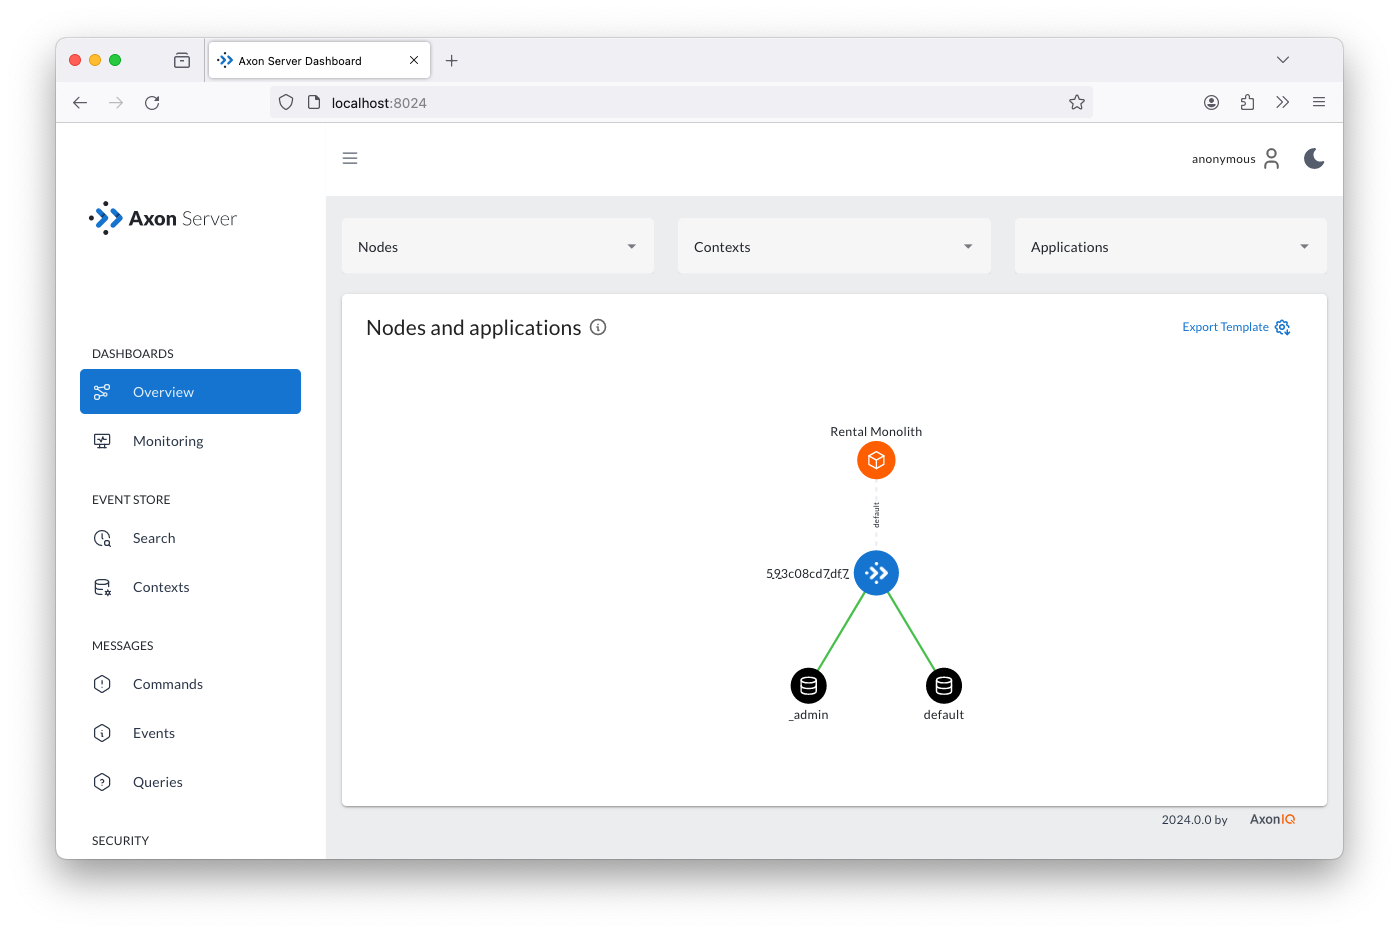
To do this, we will use the Axon Server dashboard. First, open your browser and go to the following URL
http://localhost:8024/
You will see the Axon Server dashboard, with the default instance and the Rental Monolith application connected.
Reviewing the commands
Click on the Commands button in the left panel. You will see all the command handlers registered by the application, which in this case is just one: our RegisterBikeCommand.
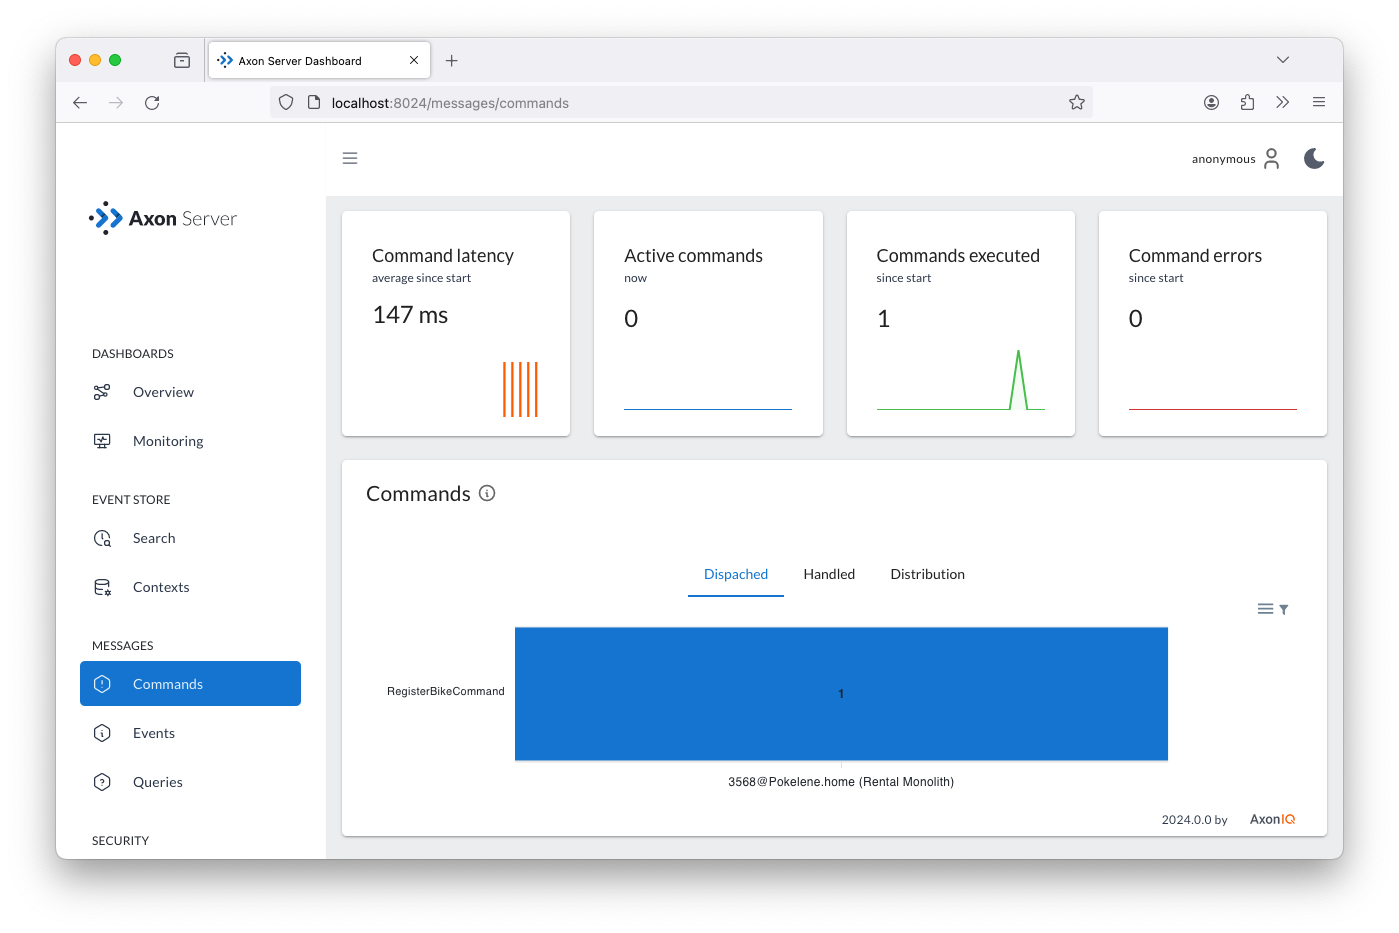
The panel also shows that one RegisterBikeCommand was received and processed in the system by the Rental Monolith application, which corresponds to the command created by the RentalController and sent through the CommandGateway.
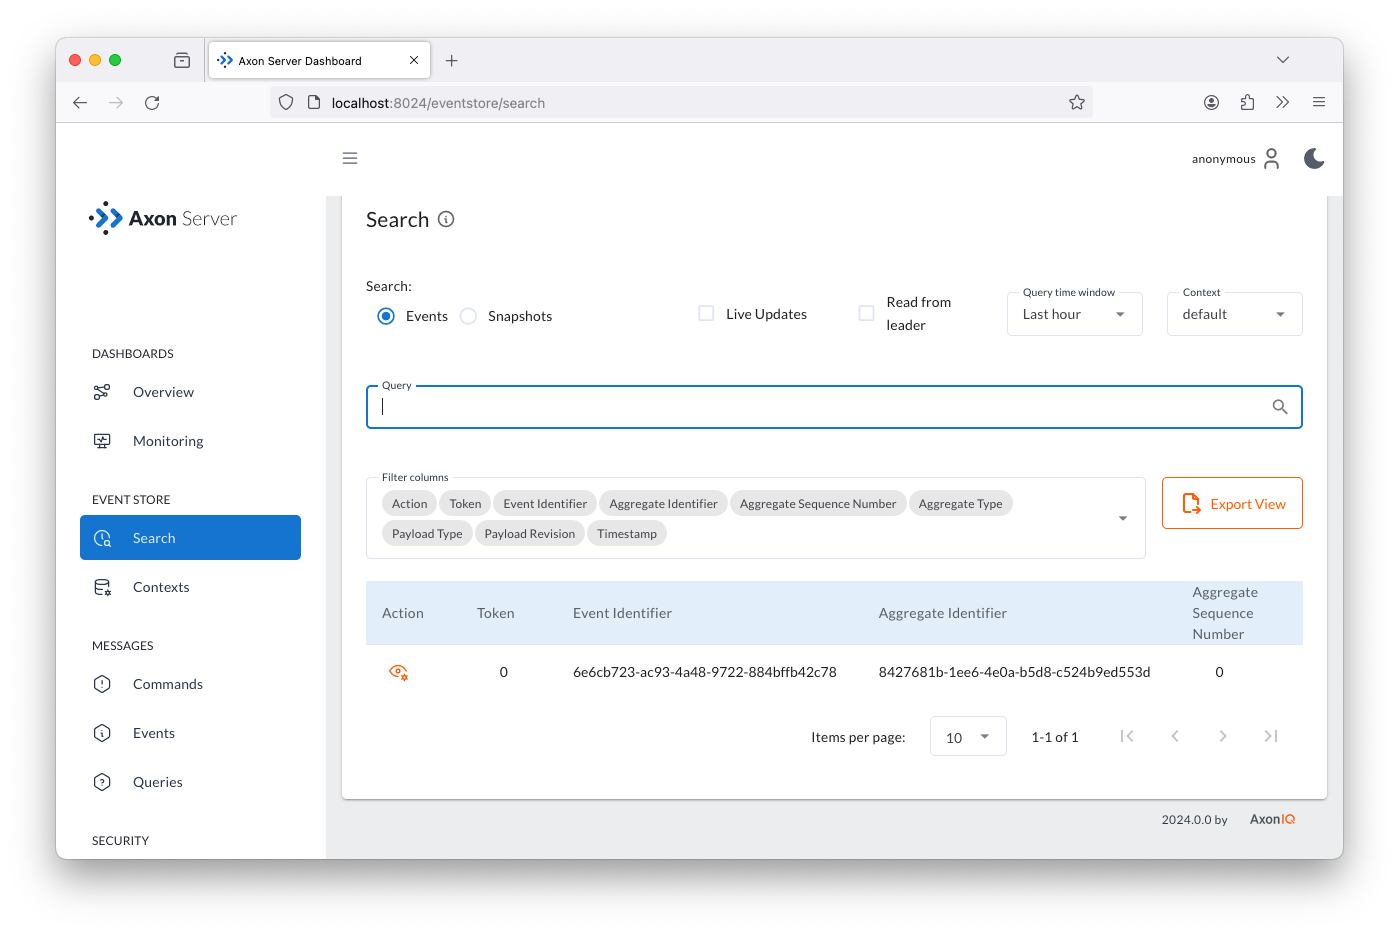
Reviewing the events
When we implemented the command handler, we validated the command and sent a BikeRegisteredEvent to notify any other component in the system of the change.
To see if this event was sent, click on the Search button on the left menu panel of the Axon Server Dashboard. This action will bring up a page allowing you to search for all events sent and stored in Axon Server.
Click on the magnifier button on right side of the Query field without specifying anything in it (leave it empty). You will see in the table below the only event that was sent as a result of running the command handler:
If you click on the eye icon in the of the Action column on the row of the event will bring up a popup panel showing all the event details.
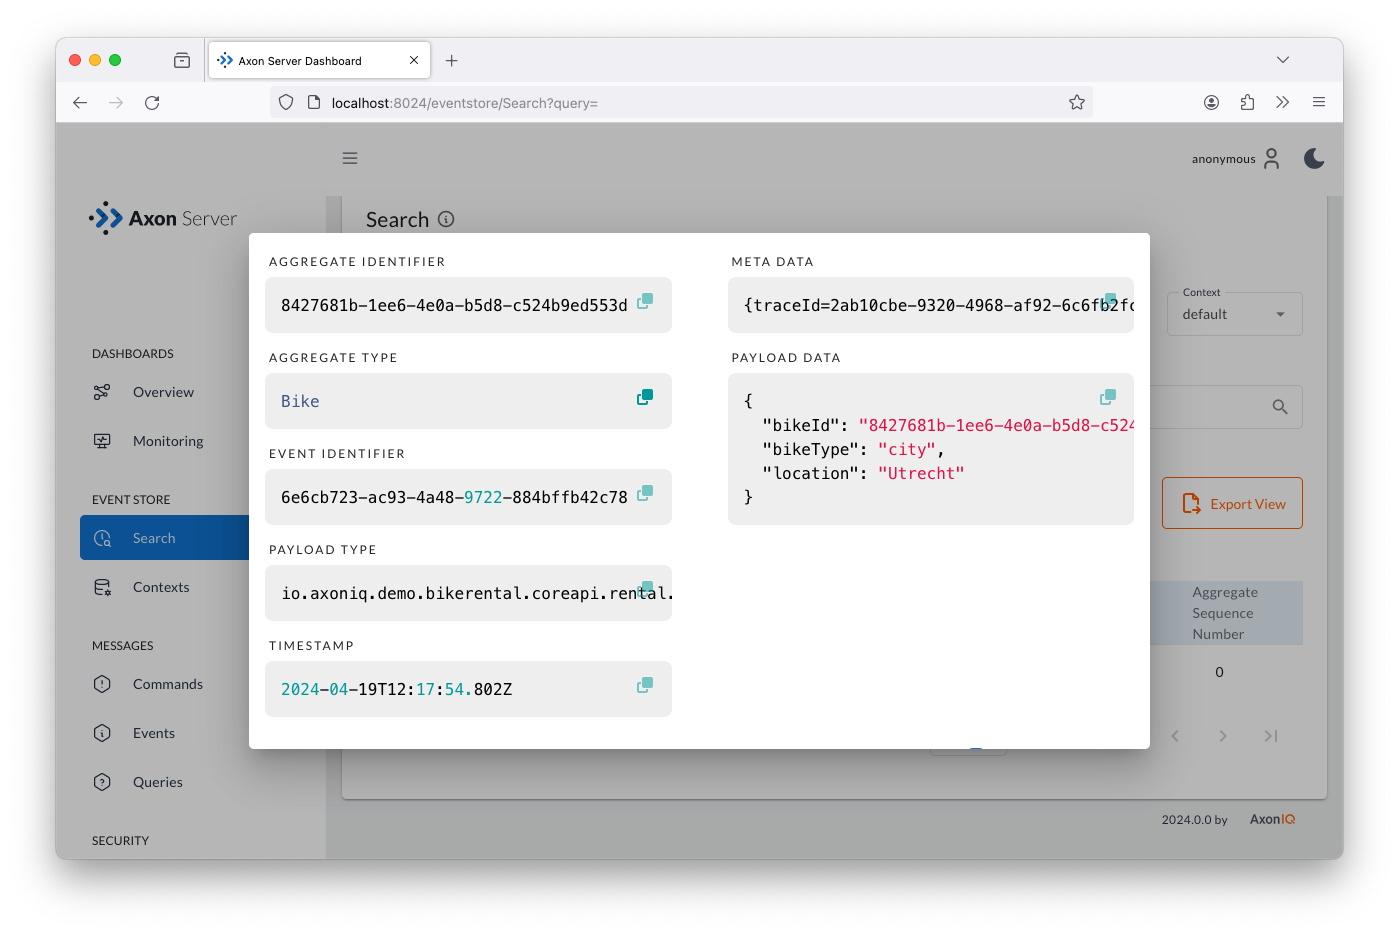
This means that our system received the request to register a new bike and handled it correctly by creating and sending the appropriate command, and as a result of handling the command, created, sent and stored the BikeRegisteredEvent.
This last BikeRegisteredEvent will be reused for any component (such as any projection in the query model) that registers to receive this type of event. The command model will also use the' BikeRegisteredEvent' whenever the Bike entity needs to be rebuilt (or refreshed).
Conclusion
Thanks to the information provided by Axon Server, it’s easy to check the commands, events (and queries) that have been sent and their contents. This is useful for checking the messages that our system exchanges to communicate the different modules.
However, we may also want to have some automated tests in the form of unit tests so that we don’t have to do these manual checks every time.
In the next section, we will learn how to write a test case with Axon to ensure the command handler processes the command correctly.